[VIDEO] Enabling AutoDJ {}

When you get a new server, AutoDJ is disabled by default. To enable AutoDJ, perform the instructions described below. 
You may also check this Video Tutorial
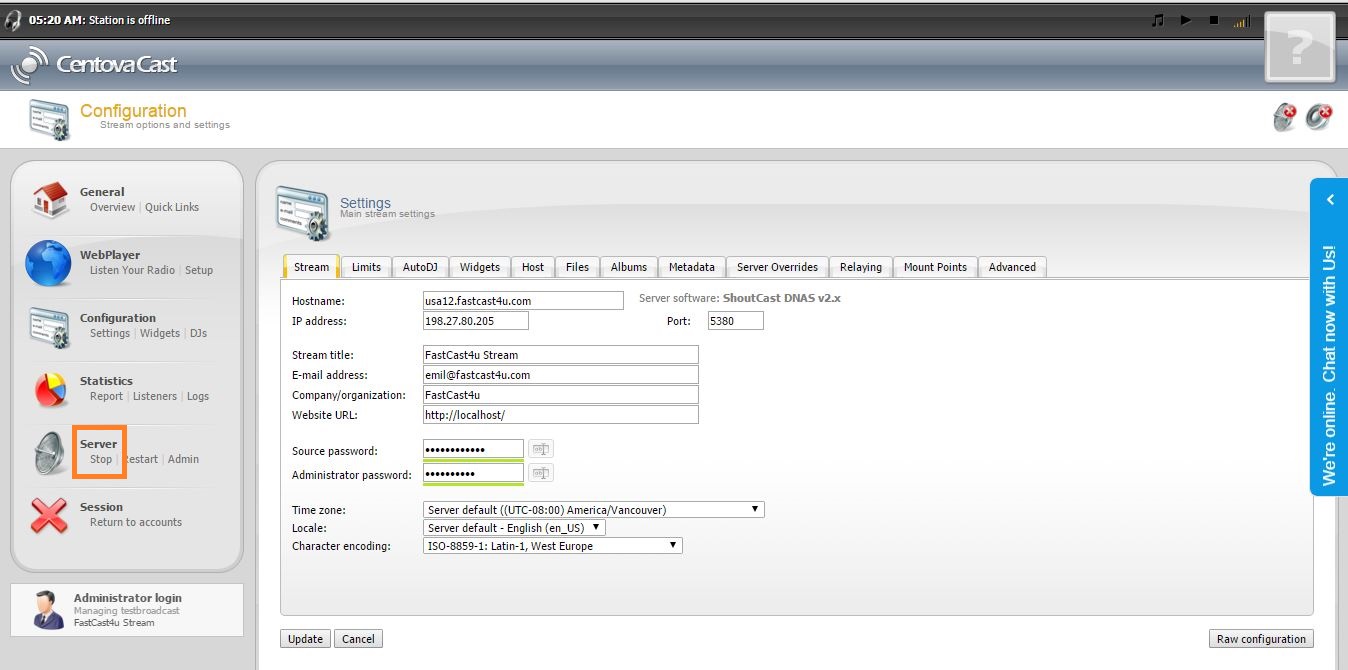
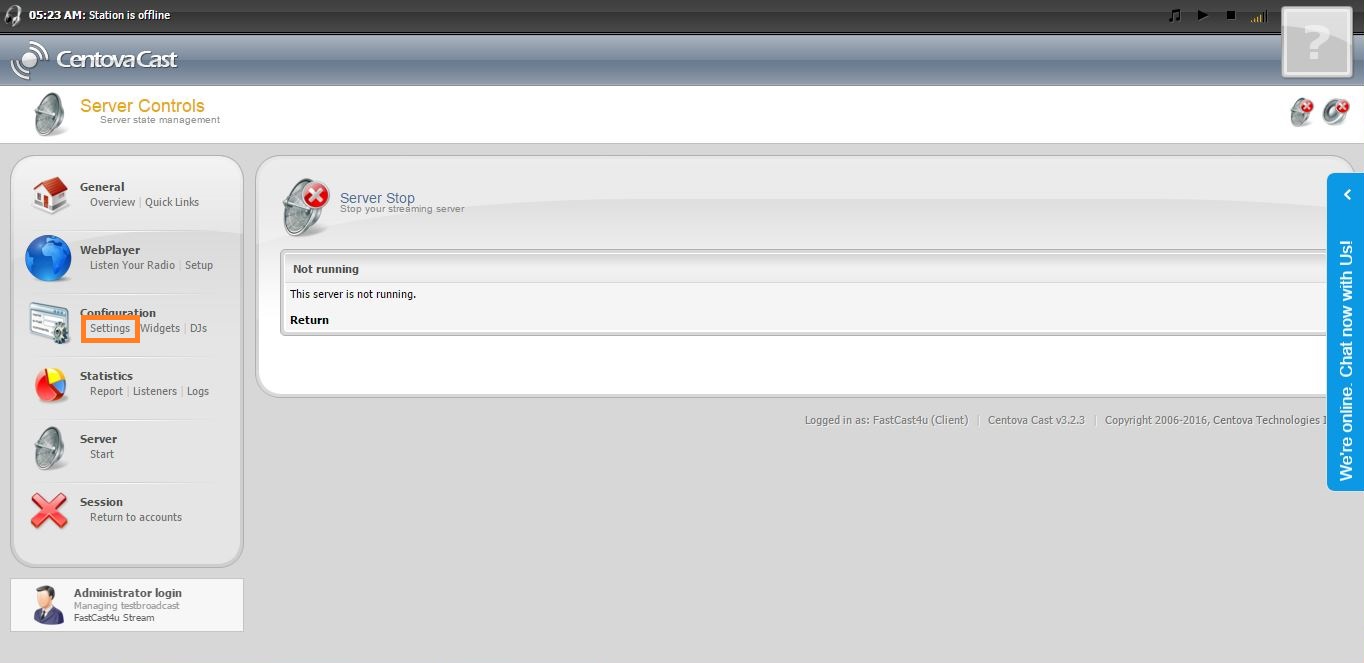
1. Stop your server

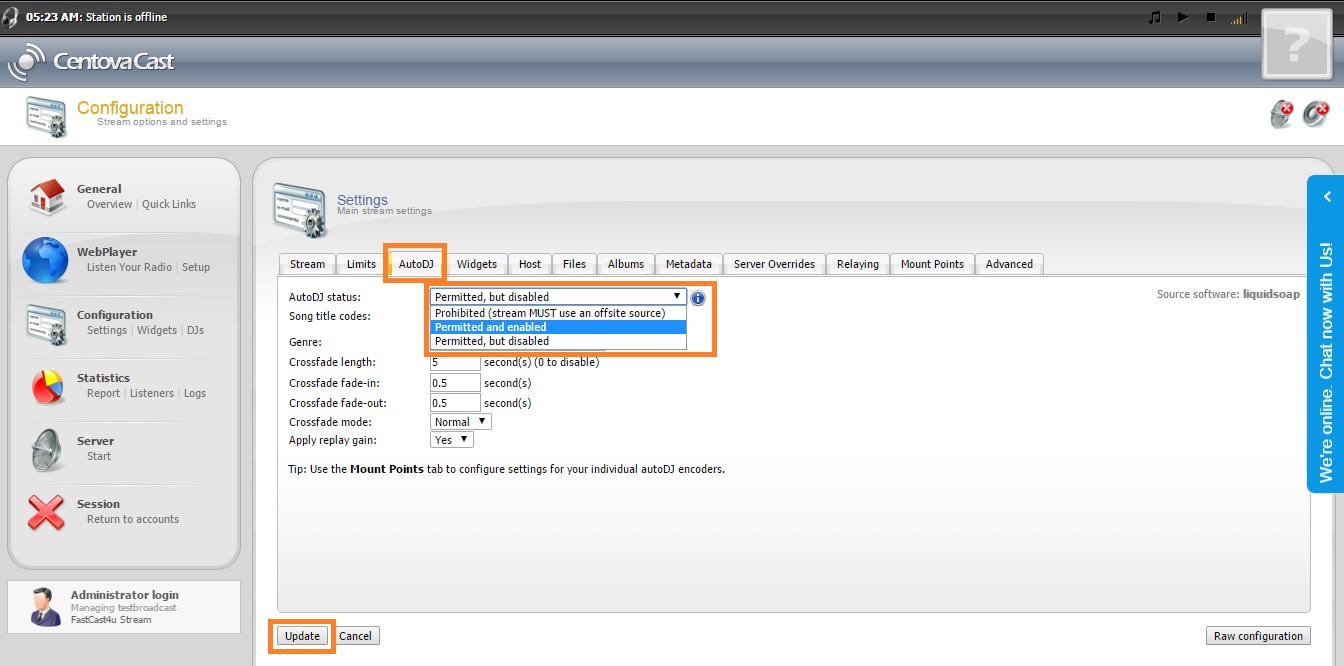
2. Go to Settings -> AutoDJ -> Permitted and enabled.

3. Select -> AutoDJ -> Permitted and enabled and click Update

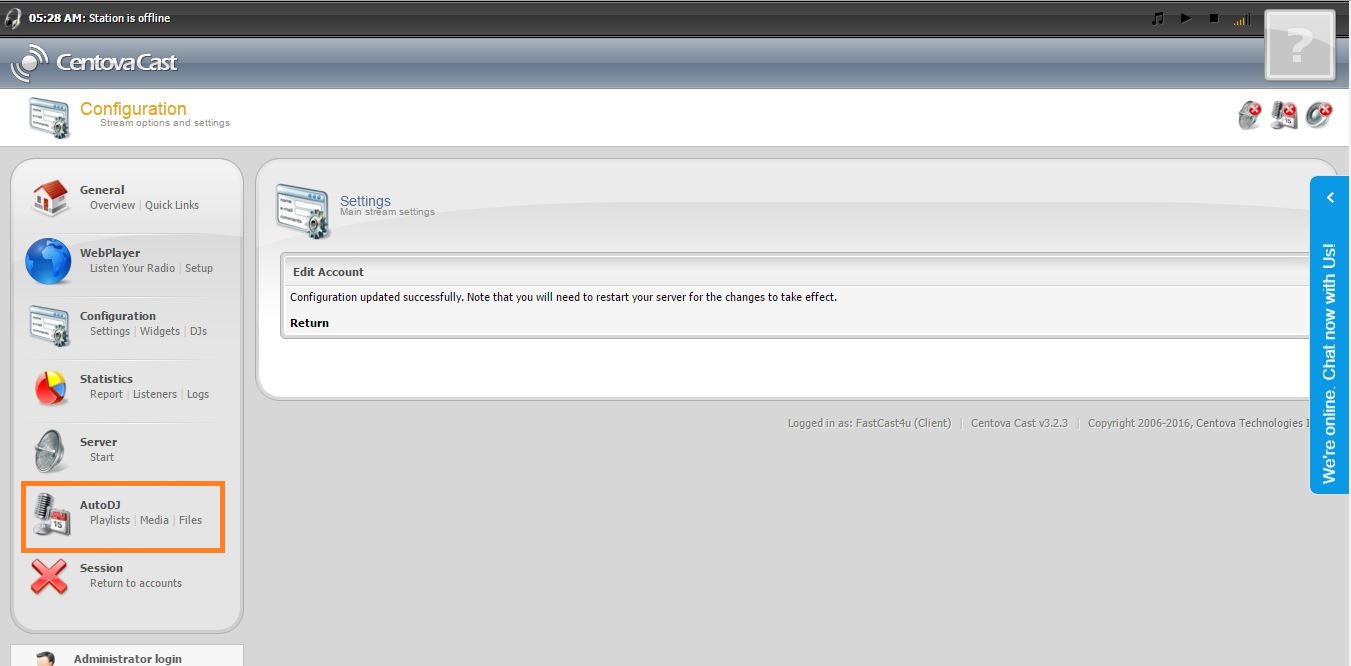
4. AutoDJ icon should appear in the menu


Notice: The server will not start unless there will be some files uploaded onto the server and added to a playlist.

Once you have enabled AutoDJ you can upload some audio files onto the server by selecting AutoDJ -> Files -> Upload. More details in this tutorial.

You can also upload file via FTP account, watch this video tutorial to learn how to do that. Next, you need to add uploaded tracks to a playlist.

  • {AutoDJ activation} - {Video Guide on how to activate your AutoDJ}
  • 0 Users Found This Useful
Was this answer helpful?

Related Articles

Adding tracks to playlists and playlists update {}

To learn how to add tracks to playlists in AutoDJ, watch the video (Video Tutorial: How to add...

Adding tracks to playlists and playlists update {}

To learn how to add tracks to playlists in AutoDJ, watch the video (Video Tutorial: How to add...

Accessing your admin panel {}

To access your server's admin panel: 1. Access your Quick links2. Click the link below "Your...

Accessing your admin panel {}

To access your server's admin panel: 1. Access your Quick links2. Click the link below "Your...

Changing the broadcasting bitrate (stream audio quality) {}

  To change the bitrate (broadcasting quality) of your stream, log in to your CentovaCast...